
How to Clean a Dryer Vent: A Safe Step-by-Step Guide
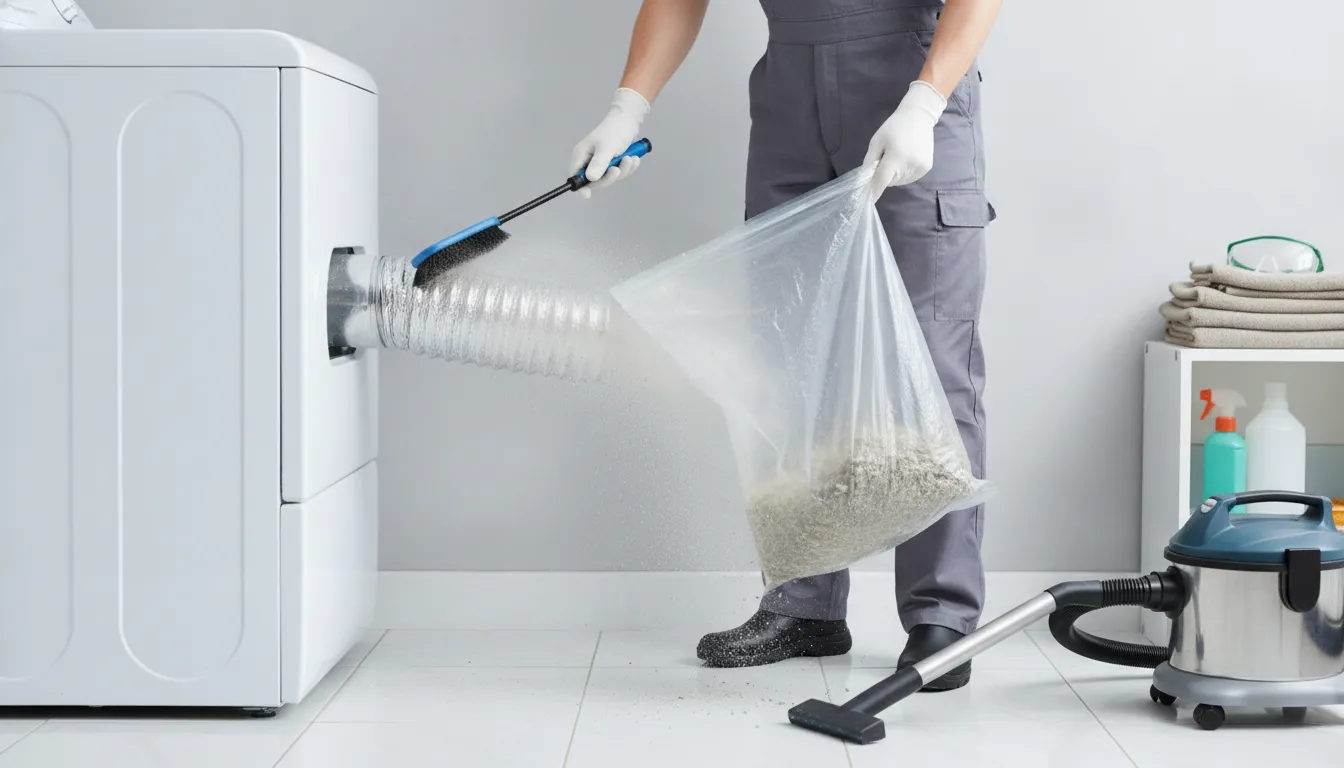
Long drying times are not always a sign that your dryer is wearing out. A restricted vent may be the real reason clothes need multiple cycles, towels remain damp, or the appliance feels unusually hot. Lint buildup can also create a serious fire concern when heat cannot escape properly. If you are researching how to clean a dryer vent, start by learning how the system works and what makes some vents harder to service than others. Short, accessible ducts may be manageable with the right equipment. Roof exits, long runs, tight bends, and damaged ducting usually require professional attention. The steps below will help you make a safe, informed decision.
Key Takeaways
- Watch for performance changes: Damp clothing, longer cycles, excess heat, weak exterior airflow, unusual odors, and visible lint may indicate a restricted vent.
- Prioritize safe cleaning: Turn off and cool the dryer, disconnect power as appropriate, use approved tools and materials, and stop if the duct is damaged or difficult to access.
- Schedule routine maintenance: Arrange annual professional cleaning for most homes, with more frequent service for heavy use, long duct runs, shared laundry areas, or recurring airflow concerns.
Why Does a Clean Dryer Vent Matter?
A dryer vent may be easy to overlook, but it plays an important role in your home’s safety, energy use, and laundry routine. The vent is the duct or hose that runs from the back of the dryer to an opening on an exterior wall or roof. It carries hot, moist air and lint outside, allowing the appliance to dry clothing properly.
The lint screen catches some fibers, but it cannot stop every particle from entering the exhaust duct. Over time, lint, dust, and other debris can collect inside the vent. Long duct runs, sharp bends, crushed sections, and exterior obstructions can make the problem worse.
A restricted vent forces the dryer to run longer and work harder. Clothes may stay damp after one cycle, the appliance may feel unusually hot, and the laundry room may become warm or humid. Lint buildup can also create a serious fire hazard. SERVPRO’s dryer vent cleaning guidance notes that clogged vents increase drying time, energy use, and fire risk.
Regular cleaning helps maintain airflow and gives you an opportunity to find damaged ducting or other problems before they become more serious. If your vent is difficult to reach or the dryer shows warning signs, professional service may be the safest choice. Cahill’s provides dryer vent cleaning services for homes and businesses in Montgomery County, Bucks County, and nearby Pennsylvania communities.
What Does a Dryer Vent Do?
During a drying cycle, the appliance removes moisture from clothing and sends warm, damp air through the exhaust duct. The vent carries that air, along with loose lint, outdoors. This process helps the dryer maintain proper airflow and temperature while keeping humidity out of your home.
The lint screen captures larger fibers, but fine particles can pass through and settle inside the duct. Pet hair, dust, and outdoor debris may also enter through the exterior opening. If the vent flap cannot open fully, air and lint may have trouble escaping.
The duct’s design affects its performance. Long runs, tight bends, crushed hoses, and unsuitable materials can restrict airflow. A properly connected, unobstructed vent gives heat and moisture a clear path outside. If you are unsure whether your system is installed correctly, an experienced technician can inspect the duct and identify hidden restrictions.
How Lint, Heat, and Moisture Create Safety Risks
Lint is lightweight and highly combustible. When it accumulates inside a dryer vent, it can limit airflow and trap heat near the appliance. The dryer may then operate for longer periods and reach higher temperatures, placing extra strain on its components.
Moisture creates another concern. A restricted vent cannot release damp air efficiently, so humidity may remain inside the duct or laundry room. That can contribute to musty odors and moisture damage around nearby walls or flooring.
A burning smell, smoke, scorching, or unusual heat requires immediate attention. Stop the dryer and unplug it if you can do so safely. The US Fire Administration’s dryer fire guidance recommends removing lint from the dryer and vent system and following the appliance manufacturer’s maintenance instructions.
How Cleaning Improves Drying Time and Efficiency
A clear vent gives warm, moist air a direct route outdoors. With better airflow, clothing can dry more evenly and may require fewer cycles. This can reduce energy use and limit the wear caused by repeatedly running the appliance.
Long drying times are often an early sign of a restricted vent. You may notice that towels remain damp, heavier items need a second cycle, or the dryer takes much longer than it once did. Do not assume these changes are simply caused by an aging appliance. A clogged or damaged vent may be the underlying problem.
Cleaning the vent can also help the dryer operate with less strain. It will not fix a faulty heating element, thermostat, or motor, but it can remove one common cause of poor performance. Continue cleaning the lint screen after every load because the screen and exhaust duct serve different functions.
Check Safety Before Cleaning
Turn off the dryer and allow it to cool completely before inspecting or cleaning the vent. Unplug an electric dryer before moving it. If you have a gas dryer, follow the manufacturer’s instructions and ask a qualified professional for help if you are unsure how to shut off the gas safely. Never disconnect the gas line yourself.
Keep the area around the appliance clear, and look for scorching, loose connections, damaged ducting, or unusual odors. Do not operate the dryer while you are away from home or leave it running unattended.
Some vent systems are not suitable for do-it-yourself cleaning. A roof exit, long duct run, narrow crawl space, heavy lint buildup, or inaccessible connection may require professional equipment. Trying to force a brush through these areas can damage the duct or push debris farther inside. Cahill’s uses experienced, IICRC-certified technicians to service dryer vents in the surrounding area.
Know When to Stop Using the Dryer
Stop using the dryer if you notice a burning odor, smoke, sparks, or unusually intense heat. Unplug it if you can do so without placing yourself at risk. If you see flames or an active fire, leave the area and call emergency services. Do not open the dryer to investigate a fire inside the appliance.
You should also stop using the dryer when clothing remains damp after several cycles, the machine shuts off unexpectedly, or airflow from the exterior vent feels weak. These signs may indicate a serious blockage, crushed duct, failed component, or another problem that needs inspection.
Do not restart the appliance just because an odor disappears. Arrange a professional evaluation, especially if you find torn ducting, heavy lint, or a vent that is difficult to access. Cahill’s contact team can help determine whether your property needs dryer vent cleaning or a closer inspection.
What Are the Warning Signs of a Clogged Dryer Vent?
A clogged dryer vent rarely becomes a problem all at once. Lint, dust, and debris can collect inside the duct over time, gradually restricting the path that carries warm, moist air outdoors. As airflow decreases, the dryer works harder, clothes take longer to dry, and heat can build up inside the appliance and vent system.
Pay attention to changes in drying time, temperature, odors, and airflow. These signs do not always confirm that the vent is clogged, since a worn heating element, damaged duct, or mechanical problem can create similar symptoms. Still, they should not be ignored. The US Fire Administration’s dryer safety guidance recommends removing lint regularly and keeping the dryer vent system clear to reduce fire risks.
If you notice more than one warning sign, stop using the dryer until you can check the system safely or arrange a professional inspection. A qualified technician can identify blockages in accessible ducts as well as vent sections that run behind walls, through ceilings, or toward the roof.
Clothes Stay Damp After One Cycle
Clothes that remain damp after a complete cycle may indicate restricted airflow. A dryer needs to move warm, moisture-filled air out of the drum and through the vent. When lint or another obstruction blocks that path, moisture remains inside the dryer, and clothing may need two or more cycles to dry.
Thick items such as towels, jeans, blankets, and bedding often show the problem first. Start by cleaning the lint screen and confirming that the selected cycle is appropriate for the load. Then check whether the exterior vent opens while the dryer runs. If drying times remain unusually long, a blockage deeper in the duct may be responsible. SERVPRO identifies damp clothing after a cycle as a common sign of poor vent airflow.
The Dryer or Laundry Room Feels Too Hot
Some warmth is normal while a dryer operates, but excessive heat is not. A blocked vent prevents hot air from escaping efficiently, which can make the dryer cabinet, laundry room, nearby walls, or floor feel much hotter than usual. You may also notice that the room becomes humid or stuffy during a cycle.
If the dryer feels unusually hot, turn it off and let it cool before inspecting anything. Do not cover the appliance or push items against the vent hose to manage the temperature. If the hose is safely accessible, look for crushing, sharp bends, or visible lint. Persistent overheating requires attention before the dryer is used again, particularly when it occurs alongside long drying times or weak exterior airflow.
Notice Burning Odors, Smoke, or a Gas Smell
A burning odor, smoke, or gas smell requires immediate action. Turn off the dryer and stop using it. A burning smell may come from overheated lint, restricted airflow, an electrical fault, or a failing component. If you see smoke or flames, leave the area and call emergency services from a safe location.
If you smell gas near a gas dryer, do not turn lights or appliances on or off, light a match, or try to locate the leak. Leave the home and contact your gas utility or emergency services from outside. Do not use the dryer again until the cause has been identified and addressed. The National Fire Protection Association’s laundry safety guidance also stresses the importance of removing lint and responding to unusual dryer conditions.
Check for Weak Airflow at the Exterior Vent
When the dryer operates, the exterior vent should release a steady flow of warm air. Weak, intermittent, or absent airflow may point to lint buildup, a crushed hose, an obstruction in the duct, or a vent flap that cannot open fully. A blocked vent may also release air only when the dryer is running for several minutes.
To check the airflow, start the dryer briefly and go outside to the vent termination. Observe whether the flap opens and whether warm air leaves the opening. Keep hands, clothing, and loose items away from moving parts. If the airflow feels weak, turn off the dryer and arrange an inspection rather than continuing to run repeated loads. A professional can trace the vent path and identify blockages that are not visible from either end.
Look for Lint or a Stuck Flap
Visible lint around the exterior vent is a useful warning sign. You may see lint on the vent hood, behind the flap, or on the ground below the opening. This can indicate that the vent is not exhausting properly, especially when it appears with longer drying times, excess heat, or damp clothing.
The flap should open while the dryer is running and close when the cycle ends. If it remains shut, sticks halfway, or cannot move because of lint, leaves, snow, ice, or an animal nest, airflow may be restricted. Remove only loose debris that you can reach without tools or climbing. For additional guidance on checking the exterior opening, review these dryer vent inspection steps. Call a professional if the obstruction is inside the duct or out of reach.
Watch for Multiple Cycles, Strange Noises, or Automatic Shutoff
A dryer that suddenly needs several cycles for ordinary loads may have an airflow problem. Restricted ventilation can make the appliance run longer and place extra strain on its components. However, strange sounds such as scraping, rattling, thumping, or repeated clicking may indicate a mechanical issue rather than a clogged vent, so do not assume lint is the only possible cause.
Automatic shutoff can also signal that the dryer is overheating. Do not keep restarting the appliance to finish a load. Clean the lint screen, let the dryer cool, and stop using it if the problem returns. SERVPRO’s dryer vent guidance notes that longer drying times, unusual operation, and overheating can occur when airflow is restricted. A professional inspection can help separate a vent problem from an appliance repair issue.
Act When You Notice a Warning Sign
One symptom may have a straightforward explanation, but several symptoms together deserve prompt attention. If clothes stay damp, the dryer feels unusually hot, and the outdoor airflow is weak, stop using the appliance until the vent system has been checked. Continuing to run the dryer adds more heat to a system that may already be restricted.
Treat a burning odor, smoke, or gas smell as an emergency rather than a cleaning task. Turn off the dryer, leave the area if needed, and contact the appropriate emergency or utility service. For a nonemergency blockage, a professional can inspect the complete vent path and remove lint from areas that household tools may not reach. Cahill’s Carpet & Upholstery Cleaning offers dryer vent cleaning services for homes and businesses in Montgomery County, Bucks County, and surrounding Pennsylvania communities.
What Tools Do You Need to Clean a Dryer Vent?
Cleaning a dryer vent safely takes more than a household vacuum and a few spare minutes. Lint can collect deep inside the duct, especially when the vent has a long run, several bends, or an exterior opening that is difficult to reach. The right tools help loosen compacted lint, remove debris, inspect the duct, and check for damaged materials.
Before starting, gather your supplies and review the dryer manufacturer’s instructions. For a basic, accessible vent, you may need a dryer vent brush kit, flexible rods, a vacuum with a long hose, a screwdriver, a flashlight, protective gear, and approved replacement materials. SERVPRO’s dryer duct cleaning guide also recommends preparing a vacuum hose attachment and screwdriver before beginning.
If the vent exits through the roof, runs a long distance, or cannot be reached safely, stop and contact a professional. Cahill’s dryer vent cleaning services help homeowners and businesses throughout Montgomery County, Bucks County, and nearby Pennsylvania communities.
Use a Dryer Vent Brush Kit and Flexible Rods
A dryer vent brush kit helps loosen lint and dust clinging to the inside of the duct. Most kits include a long brush and flexible extension rods that connect together, allowing you to reach farther into the vent than you could with a vacuum alone.
Choose a kit made specifically for dryer vents. A brush that is too large can become stuck, while one that is too stiff may damage flexible ducting. Advance the brush slowly, and never force it through a sharp bend or past an obstruction.
Some kits attach to a drill and rotate as the brush moves through the duct. If you use this type, keep the drill at a low speed and follow the manufacturer’s instructions for direction and operation. Seattle Dryer Vent Cleaning explains how flexible rods and rotating brushes work during vent cleaning.
Use a Vacuum With a Long Hose and Crevice Tool
A vacuum removes the lint that the brush loosens. Choose one with a long, flexible hose so you can reach the opening behind the dryer and, when possible, the exterior vent. A crevice tool helps collect debris around narrow openings, the lint screen housing, and the exhaust outlet.
A household vacuum may work for light debris in an accessible duct, but it may not have enough reach or suction for a long or heavily blocked vent. Do not rely on suction alone. Compacted lint can remain attached to the duct walls, particularly around bends.
Vacuum around the dryer before moving it, then clean the lint screen housing and the disconnected vent opening. Keep the nozzle from pressing against delicate appliance components. SERVPRO includes a vacuum hose attachment among its recommended tools.
Gather a Screwdriver, Flashlight, Drop Cloth, and Work Gloves
You may need a screwdriver to loosen the clamp connecting the vent hose to the back of the dryer. Keep the correct type nearby, since clamp and access-panel designs vary. Do not remove appliance panels unless the manufacturer’s instructions specifically permit it.
A flashlight helps you inspect the duct for lint buildup, crushed sections, tears, disconnected joints, and unsuitable materials. Shine it into the opening before and after cleaning. If you still cannot see far enough to inspect the duct, do not assume it is clear.
Place a drop cloth beneath and around the dryer to catch dust and lint. Work gloves protect your hands from sharp metal edges, screws, and debris. Move the appliance slowly, and ask for help if it is heavy or difficult to pull away from the wall.
Wear Eye Protection and a Dust Mask
Cleaning can release fine lint, dust, and other debris into the air. Safety glasses protect your eyes while you brush or vacuum the duct. A dust mask can also reduce exposure to airborne particles, particularly when the vent has not been cleaned for a long time.
Wear gloves and wash your hands after handling the duct or lint buildup. If you find mold, animal nesting material, pest waste, or an unusual odor, stop cleaning and arrange a professional inspection.
Keep children and pets away from the work area. Improve ventilation if dust becomes noticeable, but remember that protective gear does not make an unsafe task safe. Do not continue near exposed wiring, damaged gas components, or unstable ductwork.
Use Foil Tape, Approved Clamps, and Metal Ducting
If you find a loose connection or damaged section, use materials approved for dryer exhaust systems. Foil tape made for high-temperature ductwork can seal suitable joints, while approved clamps can secure the hose without puncturing or crushing it.
Replace crushed, torn, or unsuitable ducting with rigid or semi-rigid metal when the installation allows. Metal provides a smoother exhaust path and is less likely to collapse than plastic or vinyl. The U.S. Department of Energy recommends metal venting rather than plastic.
Do not use ordinary duct tape, screws that extend into the airflow path, or makeshift connectors. If you are unsure which duct or clamp fits your dryer, ask an appliance professional or dryer vent technician before reconnecting the system.
Follow Safety Steps for Electric and Gas Dryers
Turn off the dryer before cleaning. For an electric model, unplug the power cord. If you cannot reach the plug safely, switch off the appropriate circuit breaker and confirm that the appliance cannot start.
For a gas dryer, turn off the gas supply before moving the appliance. Do not disconnect the gas line unless you are qualified to do so. Move the dryer carefully, keeping the gas line and power cord free from strain. If you smell gas, stop immediately, leave the area, and contact the gas utility or emergency service from a safe location.
Let the dryer cool completely before beginning. Never operate it while the vent is disconnected, and do not restore power until the duct is properly reconnected. SERVPRO recommends unplugging electric dryers and turning off the gas for gas dryers.
Avoid Unsafe Tools and Materials
Do not use coat hangers, sharp rods, improvised wire, or other objects that can puncture the duct or become lodged inside it. Avoid forcing a brush through a tight bend. Never use an open flame, compressed air, or flammable cleaning product to clear lint.
Plastic, vinyl, and thin foil ducts can collect lint and may create additional safety concerns. Do not continue using ducting that is crushed, torn, or poorly fitted simply because it has been patched with tape. Seattle Dryer Vent Cleaning cautions against unsafe duct materials, which can clog more easily and contribute to dryer fire risks.
Stop if you cannot reach the full duct, the brush becomes stuck, or the vent runs through a wall, ceiling, crawl space, or roof. A professional has the equipment and experience to clean complex systems without damaging the duct or appliance.
How Do You Clean a Dryer Vent Step by Step?
Cleaning a dryer vent involves more than removing lint from the screen. Lint can collect inside the flexible hose, wall duct, and exterior vent hood, restricting airflow and trapping heat. A careful cleaning removes accessible buildup, checks the vent for damage, and confirms that air can move freely from the dryer to the outdoors.
Before you begin, read your dryer’s manual and work only on sections you can safely reach. The US Fire Administration’s dryer safety guidance recommends keeping the dryer and venting system free of lint and debris. If the duct runs through a wall, ceiling, crawl space, or roof, or if you smell gas or burning, stop and call a professional.
Turn Off, Unplug, and Cool the Dryer
Turn the dryer off and wait until it has cooled completely. Unplug an electric dryer from the wall outlet before moving it or disconnecting the vent. Do not rely on the control panel alone, since the appliance may still have power.
For a gas dryer, turn the appliance off and close the gas supply valve before pulling it away from the wall. Keep candles, cigarettes, pilot flames, and other ignition sources away from the area. Do not pull hard on the power cord or gas line. If the cord, outlet, plug, or gas connection appears damaged, leave the appliance in place and call a qualified technician.
Shut Off the Gas Without Disconnecting the Line
Gas dryers require an additional safety step. Locate the shutoff valve near the appliance and turn it off before moving the dryer. In many homes, the handle is open when it runs parallel to the gas pipe and closed when it sits across the pipe.
You usually do not need to disconnect the gas line to clean the vent. Avoid loosening fittings or stretching the line while creating space to work. If the valve is difficult to reach, damaged, or missing, do not improvise. Contact a qualified gas appliance professional. If you smell gas, leave the area without operating switches or flames, then contact your gas utility or emergency services.
Move the Dryer Without Crushing or Kinking the Duct
Pull the dryer away from the wall slowly, watching the vent connection, power cord, and gas line. Ask another person to help if the appliance is heavy or difficult to move. Avoid dragging it across flooring that could scratch.
Give yourself enough space to work without sharply bending the duct. A crushed or kinked vent creates resistance, which can trap lint and make the dryer run hotter. Do not push the appliance so close to the wall that the hose folds behind it. The Maytag dryer vent guide also recommends checking the vent path for bends and obstructions during cleaning.
Disconnect and Inspect the Vent Hose
Use a screwdriver to loosen the clamp holding the vent hose to the back of the dryer. Slide the hose off carefully instead of twisting it aggressively. Set the clamp aside so it does not get lost.
Shine a flashlight into the hose and dryer exhaust opening. Look for thick lint, dust, crushed sections, holes, corrosion, or brittle material. Buildup around the connection can indicate restricted airflow.
If the hose is torn or made from thin plastic or foil, plan to replace it with approved metal ducting. Do not rely on duct tape as a permanent repair. The National Fire Protection Association’s laundry safety guidance explains why proper vent maintenance and regular lint removal matter.
Clean the Lint Screen Housing and Exhaust Outlet
Remove the lint screen and clean it separately. Use a soft brush to loosen residue, then rinse the screen if the manufacturer allows. Let it dry completely before putting it back. Fabric softener residue can form a film that restricts airflow, so occasional washing may help.
Next, vacuum around the lint screen housing with a narrow crevice tool. Work gently, since pushing a tool too far can damage internal components. Vacuum the rear exhaust outlet as far as you can safely reach, but do not push lint deeper into the appliance.
If the housing is packed with lint or difficult to access, arrange for professional service. A technician can clean the area without damaging sensors, wiring, or drum components.
Brush and Vacuum the Vent From the Dryer Side
Insert a dryer vent brush into the open duct from the dryer side. Push it in gradually and turn it as you go, allowing the bristles to loosen lint from the interior walls. Do not force the brush through a sharp bend or push it so far that it becomes stuck.
After brushing, use a vacuum with a long hose to collect the loosened debris. Alternate between brushing and vacuuming until only a small amount of lint comes out. Keep the vacuum nozzle near the opening whenever possible.
Avoid using a household broom or improvised wire tool. These can tear the duct or leave material behind. If the brush meets firm resistance, the duct is unusually long, or you cannot reach the blockage, stop and call a professional.
Clean From the Exterior When the Design Allows
Locate the dryer vent termination outside the home. It may be on a side wall, near the foundation, or on the roof. Clean it yourself only when you can reach it safely from ground level or another stable access point.
Remove visible lint, leaves, dirt, and other debris around the opening. Use a soft brush or vacuum on the accessible section. Do not climb onto a roof or use an unstable ladder for this task. A professional should handle difficult or elevated access.
If the vent has a screen, check the dryer manufacturer’s instructions and local requirements before removing or replacing it. Screens can collect lint quickly and restrict airflow. Never cover the opening while the dryer runs or place objects over it to keep out animals.
Use Cleaning Rods Carefully and Follow the Instructions
Some dryer vent cleaning kits include flexible rods and a rotating brush. Read the product instructions before use, since kits differ in how they attach to a drill and how far they can extend. The Home Depot dryer vent guide recommends using the correct brush and taking care not to damage the duct.
If the kit permits drill use, select the recommended direction and a low speed. Keep the rods aligned with the duct and add sections one at a time. Do not reverse the drill unless the manufacturer specifically permits it.
Stop if a rod catches, bends sharply, begins separating, or becomes difficult to retrieve. Forcing the equipment can damage the duct or leave part of the brush inside. Long, blocked, or inaccessible vents are better handled with professional equipment.
Remove Lint From the Exterior Hood and Flap
Inspect the exterior vent hood after cleaning the duct. Remove lint from the hood, flap, and surrounding wall with a vacuum or soft brush. For stubborn buildup, use a tool that will not bend or break the flap.
The flap should open while the dryer runs and close when the dryer is off. Check that it moves freely and is not blocked by lint, nests, leaves, ice, or other debris. Do not tape the flap open, since this can allow pests and outdoor air into the duct.
If the hood is cracked, loose, or badly corroded, arrange for repair or replacement. A damaged termination can allow water and pests into the vent. Keep the area clear after cleaning so exhaust can leave the home properly.
Check for Kinks, Tears, Crushed Sections, and Improper Materials
Inspect the full length of the accessible vent hose. Look for sharp bends, crushed areas, tears, loose connections, and gaps where lint could escape. Pay close attention to the section behind the dryer, where the appliance can compress the duct against the wall.
Check the duct material as well. Thin plastic or foil-style accordion ducting can collect lint and may not meet local requirements. Screws that extend into the duct can catch lint and should not be used as a repair.
If the vent disappears into a wall or ceiling, do not cut into the structure to inspect it. Instead, watch for recurring symptoms such as long drying times, excessive heat, or lint around the dryer. These signs warrant a professional inspection.
Replace Damaged Ducting With Rigid or Semi-Rigid Metal
Replace damaged, crushed, or unsuitable ducting rather than patching it with tape. Use rigid or semi-rigid metal ducting approved for dryer exhaust and sized for the appliance. Keep the route as short and straight as possible, with gentle bends instead of tight turns.
Follow the dryer manufacturer’s instructions and local building requirements when replacing the duct. The US Department of Energy’s laundry guidance recommends proper venting and regular maintenance for safe, efficient dryer operation.
Do not connect sections with materials that reduce the interior diameter or create a rough surface. Avoid plastic, vinyl, and makeshift tubing. If the duct enters a wall, ceiling, crawl space, or roof, have a qualified professional complete the replacement.
Reconnect the Vent for Smooth, Unobstructed Airflow
After cleaning and inspecting the duct, reconnect the vent hose securely. Slide it fully over the dryer outlet and fasten it with an approved clamp. The connection should be snug, but avoid overtightening the clamp and crushing the duct.
Check the route behind the appliance before pushing the dryer back. The hose should not fold, sag sharply, or press tightly against the wall. Leave enough space for the duct to keep its shape when the dryer returns to its normal position.
Reconnect the exterior end if you removed it, and check every joint. Do not use screws that protrude into the duct. If a joint is loose or the hose cannot sit without kinking, replace the section or call a professional rather than forcing the dryer into place.
Restore Power and Test Exterior Airflow
Return the dryer to its normal position without crushing the duct. Plug an electric dryer back into the wall outlet. For a gas dryer, confirm that the gas connection remains undisturbed before reopening the shutoff valve.
Run the dryer on an air-only or low-heat setting for several minutes. Go outside and check the vent hood. You should feel a steady flow of warm air, and the flap should open while the dryer operates. Listen for unusual rattling or scraping.
If airflow remains weak, stop the dryer and check the accessible connections again. A blockage may remain deeper in the duct, or the vent may have a design problem. Do not continue using the appliance while troubleshooting a suspected restriction.
Avoid Common Dryer Vent Cleaning Mistakes
Do not clean only the lint screen and assume the vent is clear. Lint can collect inside the screen housing, hose, wall duct, and exterior hood. Avoid pushing a brush aggressively, operating a drill at high speed, or leaving cleaning rods inside the duct.
Never ignore a burning odor, smoke, melted material, or unusual heat. Turn the dryer off and unplug it if you can do so safely, then arrange for professional service. If you smell gas, leave the home and contact your gas utility or emergency services. Do not operate electrical switches near the odor.
Also avoid working on inaccessible ducts, roof vents, damaged gas connections, or heavily clogged systems without the right equipment. Cahill’s dryer vent cleaning services help homeowners and businesses in Montgomery County, Bucks County, and nearby Pennsylvania communities address difficult venting problems safely.
How Often Should You Clean a Dryer Vent?
Most homes should have the dryer vent professionally cleaned at least once a year. Lint can collect inside the duct even when you clean the lint screen after every load. As buildup increases, airflow decreases, drying takes longer, and the dryer may run hotter than it should.
Your ideal cleaning schedule depends on several factors, including how often you use the appliance, how long the vent run is, how many bends it contains, and whether the duct exits through a wall or roof. A shared laundry room or commercial facility may need more frequent service than a single-family home.
Between professional cleanings, watch for changes in drying performance. Clothes that stay damp, an unusually hot laundry room, weak airflow outside, or a burning odor can all signal a restricted vent. The U.S. Fire Administration’s dryer safety guidance also recommends regular lint removal and safe dryer maintenance.
Schedule a Thorough Cleaning at Least Once a Year
Annual dryer vent cleaning is a practical schedule for most households. A professional cleaning removes lint and debris that can pass through the screen and collect inside the exhaust duct. It also gives a technician the opportunity to identify loose connections, crushed sections, damaged ducting, or an exterior flap that does not open correctly.
A yearly appointment is especially important if you do not know when the vent was last cleaned or if the dryer has remained in the same location for several years. SERVPRO recommends regular dryer duct cleaning to help maintain airflow and reduce hazards linked to lint buildup.
Clean More Often With Heavy Use, Long Runs, or Shared Laundry
You may need dryer vent cleaning every six months if your household runs several loads each week. Frequent use sends more lint through the exhaust system, which can lead to faster accumulation. A long duct run, multiple bends, or a vent that passes through a wall, ceiling, or attic can also collect debris more readily.
Shared laundry rooms and commercial facilities often require a shorter cleaning interval because multiple dryers may operate throughout the day. Ask a professional to inspect the system and recommend a schedule based on its layout, airflow, and usage. Keeping a written maintenance schedule can also help property owners and managers avoid missed service.
Clean the Lint Screen After Every Load
Remove lint from the screen after every load. This simple habit helps maintain airflow and limits the amount of material that reaches the vent. Check the screen for residue from dryer sheets and fabric softener, since that residue can form a film and restrict airflow.
Wash the screen occasionally with warm water and mild soap, then let it dry completely before replacing it. Never run the dryer without the screen in place. Even a clean screen cannot catch every particle, so it does not replace professional vent cleaning.
If drying times begin to increase despite regular screen cleaning, inspect the full vent system. The issue may be deeper inside the duct, at the exterior hood, or behind the dryer.
Keep the Exterior Vent Free of Lint, Debris, Nests, Snow, and Ice
Check the exterior vent several times a year, especially before and after winter. Remove visible lint, leaves, dirt, and animal nesting material from the hood. Snow and ice can also block the opening and prevent warm, moist air from leaving the duct.
When the dryer runs, the exterior flap should open freely, and you should feel a steady stream of air. Weak airflow, a flap that barely moves, or lint collecting around the opening may indicate a restriction inside the duct. Do not cover the opening with a screen or material that could trap lint.
If the vent is on a roof, high wall, or another difficult-to-reach location, do not use an unstable ladder to inspect it. Arrange professional service instead.
Hire a Professional for Roof Exits, Long Runs, and Inaccessible Ducts
A basic brush kit may not clean a long or complicated vent thoroughly. Roof exits, multiple bends, and ducts that pass through walls or ceilings require the right equipment and careful handling. Reaching the exterior hood may also require roof or ladder access, creating a fall risk.
Professional technicians can select tools suited to the length and design of the duct. They can also look for crushed sections, loose connections, and other airflow problems. Avoid pushing cleaning rods into a vent when you cannot see the path. Rods can separate, become stuck, or damage flexible ducting.
Professional help is also appropriate when the duct runs through a crawl space, attic, or enclosed area. A complete inspection can identify problems that are not visible from the laundry room.
Call a Professional for Recurring Clogs, Damaged Ducts, or Burning Odors
A vent that clogs repeatedly may have an underlying problem. The duct could be too long, improperly routed, crushed behind the dryer, disconnected, or made from a material that collects lint. Damaged ducting may also release hot, moist air into a wall, attic, crawl space, or laundry room.
Stop using the dryer if you smell burning, see smoke, notice melted material, or feel excessive heat around the appliance. Do not restart it until a qualified professional has inspected the dryer and vent system. If you smell gas near a gas dryer, leave the area and contact your gas utility or emergency services from a safe location.
Do not attempt to repair damaged ductwork with household tape or improvised materials. A technician can determine whether the vent needs cleaning, repair, or replacement.
Choose Cahill’s for Dryer Vent Cleaning in Montgomery and Bucks Counties
Cahill’s Carpet & Upholstery Cleaning serves homeowners and businesses in Huntingdon Valley, Montgomery County, Bucks County, and nearby Pennsylvania communities. Its bonded, uniformed professionals use specialized cleaning equipment to remove lint and debris while checking accessible portions of the vent for common airflow concerns.
With 48 years of cleaning experience and IICRC-certified technicians, Cahill’s can help you determine a practical maintenance schedule for your home or facility. Service is available within a 12-mile radius, including Southampton, Jenkintown, Abington, Willow Grove, Langhorne, and Newtown.
Visit Cahill’s dryer vent cleaning service page to learn more, or contact the team to ask about service in your area.
Frequently Asked Questions
How can I tell whether my dryer vent needs cleaning?\ Common clues include clothes taking longer to dry, a dryer that feels unusually hot, weak airflow at the exterior vent, or lint collecting around the vent opening. A burning odor, smoke, or gas smell requires immediate action. Stop using the dryer and contact the appropriate emergency or utility service.
Can I clean my dryer vent myself?\ You may be able to clean a short, accessible vent with a dryer vent brush and vacuum. Professional service is a safer choice for roof exits, long duct runs, tight bends, heavy buildup, damaged ducting, or vents located behind walls and ceilings. Do not force tools into a duct you cannot safely inspect.
How often should a dryer vent be cleaned?\ Many households benefit from professional cleaning once a year. Homes with frequent laundry, long or complicated ductwork, or shared laundry facilities may need service more often. Clean the lint screen after every load and check the exterior vent regularly between appointments.
Does dryer vent cleaning reduce energy use?\ A clear vent allows warm, moist air to leave the dryer more efficiently. Clothes may dry in fewer cycles, which can reduce unnecessary energy use and strain on the appliance. Cleaning will not correct a faulty heating element, motor, thermostat, or other mechanical issue.
Why choose Cahill’s for dryer vent cleaning?\ Cahill’s serves homes and businesses throughout Montgomery County, Bucks County, and nearby Pennsylvania communities. Its bonded, uniformed professionals use specialized equipment and bring 48 years of cleaning experience, along with IICRC-certified technicians, to dryer vent service.